
The Keurig K-Mini is a sleek, compact single-serve coffee maker designed for small spaces, offering a modern and convenient brewing experience with K-Cup pods․
1․1 Overview of the Keurig K-Mini Coffee Maker
The Keurig K-Mini is a compact, single-serve coffee maker designed for small spaces, offering a sleek and modern design․ It uses K-Cup pods for convenience and features a removable water reservoir․ The brewer is lightweight, portable, and easy to use, making it ideal for apartments, offices, or travel․ Its compact size and streamlined functionality ensure a perfect brewing experience without sacrificing counter space․
1․2 Key Features of the K-Mini
The Keurig K-Mini features a compact design, auto-off functionality for energy savings, cord storage for convenience, and compatibility with travel mugs․ It includes a removable water reservoir, a simple one-touch brewing system, and a drip tray for easy cleanup․ The brewer is lightweight, portable, and designed for quick brewing with K-Cup pods, making it a versatile option for coffee lovers with limited space․
1․3 Benefits of Using the K-Mini
The Keurig K-Mini offers space-saving convenience, perfect for small kitchens or offices․ Its energy-saving auto-off feature reduces power consumption, while cord storage keeps countertops tidy․ Compatible with travel mugs, it’s ideal for on-the-go users․ The compact design and easy cleaning make maintenance simple, ensuring long-lasting performance․ These features combine to provide a hassle-free, efficient brewing experience tailored to modern lifestyles․

Unpacking and Setting Up Your Keurig K-Mini
Unpack the K-Mini, remove tape, and extend the cord․ Plug it into a grounded outlet, press the power button, and follow initial setup steps to get started․

2․1 Removing Packaging and Accessories
Carefully remove the Keurig K-Mini from its box and discard all packaging materials․ Gently unpack any accessories, such as the user manual or K-Cup samples, if included․ Inspect the brewer for any damage or loose parts․ Ensure all components, like the water reservoir and drip tray, are accounted for․ Handle the brewer with care to avoid scratches or damage during unpacking․
2․2 Plugging In and Initial Setup
Plug the Keurig K-Mini into a grounded outlet to ensure proper power supply․ Extend the cord from the storage compartment at the back of the brewer․ Press the power button to turn it on; the indicator light will illuminate․ Perform the initial setup by running a cleansing rinse without a K-Cup pod to prepare the brewer for use․ Follow the on-screen instructions or manual guidelines for a seamless setup process․
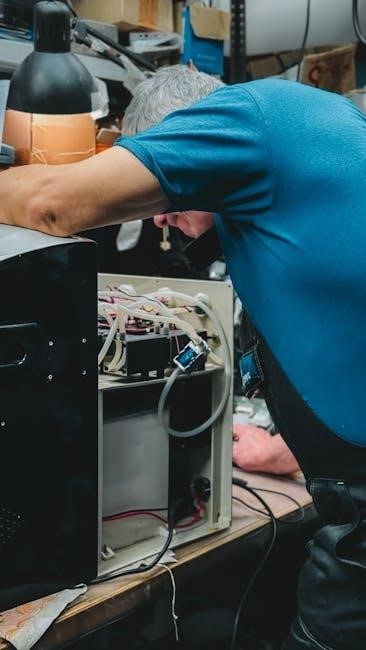
2․3 Understanding the Brewer’s Components
Familiarize yourself with the Keurig K-Mini’s components: the water reservoir, power button, brew indicator light, handle, K-Cup pod holder, drip tray, and cord storage․ The water reservoir holds up to 12oz of water, while the drip tray collects overflow and is removable for easy cleaning․ The brew indicator light signals readiness, and the handle operates the K-Cup pod holder․ Understanding these parts ensures efficient operation and maintenance of your coffee maker․

Brewing Your First Cup
Prepare your Keurig K-Mini by adding water to the reservoir, inserting a K-Cup pod, and selecting your brew size․ Press the brew button to start the cycle․
3․1 Preparing for the First Brew
Before brewing, ensure the Keurig K-Mini is properly unpacked and plugged in․ Remove any packaging materials and tape․ Fill the water reservoir with fresh, filtered water, avoiding distilled water․ Place a mug on the drip tray․ Perform a cleansing rinse by running a brew cycle without a K-Cup pod to prime the machine․ This step ensures the brewer is ready for your first cup of coffee․
3․2 Adding Water to the Reservoir
Lift the reservoir lid and pour fresh, filtered water into the tank․ Ensure the water level stays between the MIN and MAX marks․ Avoid using distilled or reverse osmosis water for optimal taste․ Replace the lid securely․ The reservoir is designed for single-use, so empty and refill it regularly to maintain water quality and prevent bacterial growth․ Proper water levels ensure consistent brewing performance․
3․3 Inserting the K-Cup Pod
Lift the handle to open the K-Cup pod holder․ Place a K-Cup pod in the holder, ensuring it is aligned and seated properly․ Close the handle completely to secure the pod․ You will hear a slight sound when the pod is punctured․ The brew indicator light will flash, signaling the brewer is ready․ Do not remove the foil lid from the K-Cup pod before insertion to avoid spillage․
3․4 Completing the Brew Cycle
Press the brew button; the indicator light will illuminate․ The brewer heats up and begins dispensing your coffee․ Brewing typically takes about 2 minutes․ Once complete, the light will no longer flash․ Carefully remove your mug and dispose of the used K-Cup pod by lifting the handle․ Avoid lifting the handle during brewing to prevent spillage or injury from hot water․

Customizing Your Brewing Experience
Personalize your coffee with adjustable cup sizes, K-Cup pod selection, and high-altitude brewing options to suit your preferences for the perfect cup every time effortlessly․
4․1 Adjusting Cup Size
The Keurig K-Mini allows you to customize your brew by adjusting the cup size to fit your preferences․ Simply add water to the reservoir up to the desired level, between 6 to 12 ounces, and place your mug on the drip tray․ The brewer will automatically dispense the selected amount of water, ensuring a perfectly sized cup of coffee every time․ This feature makes it easy to tailor your coffee experience to your needs․
4․2 Selecting the Right K-Cup Pod
Choose from a wide variety of K-Cup pods to suit your taste preferences․ For optimal performance, use Keurig-approved pods designed for single-serve brewers․ Consider roast levels, flavors, and brands to find your perfect cup․ High-altitude brewing may require adjusting pod puncture for proper flow․ Always ensure the pod is properly seated and the handle is fully closed before brewing to avoid issues with extraction or flow․ Experiment with different options to enhance your brewing experience․
4․3 High Altitude Brewing Tips
At high altitudes, water flow may be affected due to lower air pressure․ To ensure optimal brewing, gently press down on the K-Cup pod while the handle is up to puncture the bottom․ This helps maintain proper flow and prevents issues․ For best results, run a water-only brew cycle after adjusting the pod․ This simple step ensures consistent performance and flavor at elevated locations․ Always follow these tips for a perfect cup every time․

Maintenance and Cleaning
Regular cleaning ensures optimal performance․ Wipe the exterior with a damp, non-abrasive cloth and dry thoroughly․ Empty and rinse the drip tray often, and descale every 3-6 months for lasting efficiency․ Always unplug before cleaning to maintain safety and prevent damage to internal components․ Proper care extends the lifespan and quality of your brewer․
5․1 Cleaning the Exterior
Regularly clean the Keurig K-Mini’s exterior with a damp, soapy, lint-free cloth to maintain its appearance․ Avoid abrasive cleaners or immersing the brewer in water․ For tougher stains, mix a mild dish soap with warm water, but ensure no moisture seeps into openings․ Dry thoroughly with a soft cloth to prevent water spots․ This simple maintenance keeps your brewer looking new and functioning optimally over time․
5;2 Emptying and Cleaning the Drip Tray
The drip tray, holding up to 8 ounces, should be emptied and cleaned periodically․ Slide it out carefully to avoid spills, then rinse with a damp, soapy, lint-free cloth․ Avoid abrasive cleaners or submerging it in water․ Dry thoroughly to prevent water spots․ Regular cleaning ensures optimal performance and prevents overflow, keeping your Keurig K-Mini running smoothly and maintaining hygiene standards for every brew․
5․3 Washing the Water Reservoir
Regularly clean the water reservoir to maintain hygiene and performance․ Use a damp, non-abrasive cloth to wipe the inside and underside of the lid․ Avoid using abrasive cleaners or immersing the reservoir in water․ After cleaning, allow it to air dry completely, as lint from cloths can remain․ This ensures fresh water quality and prevents mineral buildup, keeping your Keurig K-Mini functioning optimally for every brew․
5․4 Cleaning the K-Cup Pod Holder
Remove the K-Cup pod holder by lifting the brewer handle and releasing it from the bottom․ Wash it with a damp, non-abrasive cloth, ensuring no coffee grounds remain․ For stubborn residue, use a straightened paper clip to clear the exit needle․ Reattach securely after cleaning․ Regular maintenance prevents clogs and ensures smooth brewing performance, keeping your Keurig K-Mini in optimal condition for consistent coffee quality․
5․5 Cleaning the Entrance and Exit Needles
Clean the entrance and exit needles using a straightened paper clip to remove coffee grounds․ Insert the clip into both holes of the entrance needle and gently move it around․ For the exit needle, located in the K-Cup pod holder, repeat the process to ensure proper flow․ After cleaning, run two water-only brew cycles without a K-Cup pod to flush the system․ This prevents clogs and maintains brewing performance effectively․

Descaling Your Keurig K-Mini
Descaling every 3-6 months prevents mineral buildup․ Use Keurig Descaling Solution and follow a 45-minute process, including cleansing rinse, internal soak, and fresh water rinse cycles to maintain optimal performance․
6․1 Importance of Descaling
Descaling is crucial to remove mineral buildup, ensuring optimal performance and longevity․ Scale accumulation can hinder water flow and heating efficiency, affecting brew quality․ Regular descaling maintains the brewer’s internal components and prevents potential damage, ensuring consistent and delicious coffee every time․ It’s recommended every 3-6 months, depending on water hardness and usage frequency․
6․2 Steps for Descaling the Brewer
To descale your Keurig K-Mini, start by gathering a large ceramic mug, fresh water, Keurig Descaling Solution, and access to a sink․ Pour one-third (4․6oz) of the solution into the reservoir, add fresh water to the 10oz fill line, and brew without a K-Cup pod․ Repeat for internal soaking, letting it sit 30 minutes․ Finally, rinse thoroughly with fresh water in multiple cycles to remove any solution residue and ensure clean brewing․
6․3 Fresh Water Rinse After Descaling
After descaling, perform a fresh water rinse to remove any solution residue․ Fill the reservoir with fresh water up to the recommended level․ Brew multiple cycles without a K-Cup pod, discarding the water each time․ Repeat this process at least three times to ensure all solution is flushed out․ If any taste remains, additional rinse cycles may be needed to restore the brewer’s performance and water quality․
Troubleshooting Common Issues
This section helps resolve common issues like no power, slow flow, or grounds in coffee․ Follow troubleshooting steps to ensure optimal performance and quick fixes․
7․1 No Power or Brewer Not Turning On
If your Keurig K-Mini won’t turn on, ensure it’s properly plugged into a grounded outlet․ Check the power button for functionality and verify that the brewer is receiving power․ If issues persist, reset the brewer by unplugging it for 30 seconds and plugging it back in․ Contact Keurig support if the problem continues for further assistance or potential repair options․
7․2 Slow or No Water Flow During Brewing
Slow or no water flow during brewing can occur due to mineral buildup or clogged needles․ Check water levels in the reservoir and ensure it’s filled correctly․ Descale the brewer every 3-6 months to remove scale․ Clean the entrance and exit needles with a straightened paper clip to clear blockages․ Ensure the K-Cup pod is properly seated and punctured․ If issues persist, contact Keurig support for further troubleshooting or repair options․
7․3 Coffee Grounds in the Brewed Coffee
Coffee grounds in your brewed coffee may indicate an issue with the K-Cup pod or the brewer’s needles․ Ensure the K-Cup pod is properly seated and punctured․ Clean the exit needle with a straightened paper clip to remove any blockages․ Run a water-only brew cycle after cleaning to flush out any residual grounds․ If the problem persists, descale your brewer and contact Keurig support for further assistance or potential repair options․
7․4 Brewer Not Recognizing the K-Cup Pod
If the brewer doesn’t recognize the K-Cup pod, ensure it’s properly seated and the handle is fully closed․ Check for blockages in the entrance or exit needles, which can prevent proper puncture․ Clean the needles with a straightened paper clip to remove any debris․ After cleaning, run a water-only brew cycle to ensure proper function․ If the issue persists, contact Keurig customer support for assistance or potential repair options, as it may indicate a faulty needle mechanism․
Additional Features and Tips
The Keurig K-Mini features an Auto-Off function, cord storage for convenience, and compatibility with travel mugs by removing the drip tray for larger cups․
8․1 Auto-Off Function for Energy Savings
The Keurig K-Mini includes an Auto-Off feature that automatically turns off the brewer 90 seconds after the last brew, reducing energy consumption and promoting eco-friendly usage․ This convenient setting ensures the machine remains energy-efficient without requiring manual intervention․ Users can enjoy their coffee while knowing their brewer is conserving power when not in use, making it an ideal choice for environmentally conscious consumers․
8․2 Cord Storage for Convenience
The Keurig K-Mini features a built-in cord storage compartment, allowing users to neatly store the power cord when the brewer is not in use․ This convenient design keeps countertops tidy, prevents cord tangling, and makes transporting the brewer effortless․ The cord storage compartment is located at the back of the machine, ensuring a clutter-free and organized kitchen space for a sleek appearance․
8․3 Travel Mug Compatibility
The Keurig K-Mini accommodates travel mugs for added convenience, perfect for on-the-go use․ By removing the drip tray, larger mugs up to a certain height can fit seamlessly under the spout․ This feature ensures that users can enjoy their freshly brewed coffee in their favorite travel mug without compromising on flavor or convenience, making it ideal for busy lifestyles and daily commutes․

Storage and Transportation
Proper storage and transportation of your Keurig K-Mini involve emptying the water reservoir, ensuring the brewer is dry, and avoiding exposure to freezing temperatures․ Allow it to warm up if stored in cold conditions for optimal performance․
9․1 Preparing the Brewer for Storage
Before storing the Keurig K-Mini, empty the water reservoir and wipe it dry to prevent mineral buildup․ Clean the exterior with a damp cloth and ensure the brewer is free from moisture․ Avoid submerging the brewer in water or exposing it to freezing temperatures․ Store it in a safe, dry location to maintain its condition and performance when you’re ready to use it again․
9․2 Transporting the Brewer Safely
When transporting the Keurig K-Mini, ensure the water reservoir is empty and the brewer is completely dry․ Avoid exposing it to extreme temperatures or direct sunlight․ Use the cord storage feature to keep the cord tidy and prevent damage․ Handle the brewer with care to avoid scratches or dents․ For long-distance moves, consider using the original packaging or padding to protect it during transit․
Accessories and Compatibility
Explore Keurig-approved accessories like reusable filters and travel mugs․ The K-Mini is compatible with all K-Cup pods, offering a wide variety of flavors and brands to enjoy․
10․1 Recommended Keurig Accessories
Enhance your Keurig K-Mini experience with official accessories; A reusable My K-Cup filter allows you to brew your favorite ground coffee, while a travel mug fits perfectly without the drip tray․ Cord storage keeps your counter tidy, and the Keurig Descaling Solution maintains your brewer’s performance․ These accessories ensure convenience, efficiency, and optimal brewing results for years to come․
10․2 Compatible K-Cup Pods and Brands
The Keurig K-Mini works seamlessly with a wide variety of K-Cup pods from popular brands like Green Mountain Coffee, Dunkin’, and Starbucks․ You can also explore Keurig’s own range of teas, hot chocolates, and flavored coffees․ For eco-conscious users, recyclable K-Cup pods are available․ Additionally, compatible third-party pods offer even more flavor options, ensuring you never run out of choices to suit your taste preferences and dietary needs․
Warranty and Support
The Keurig K-Mini is backed by a one-year limited warranty․ For assistance, visit support․keurig․com or call 1-866-901-BREW (2739) for expert help and troubleshooting․
11․1 Understanding Your Warranty
The Keurig K-Mini is covered by a one-year limited warranty, protecting against defects in materials and workmanship․ The warranty applies to the original purchaser and covers repairs or replacements during this period․ For more details on warranty terms, visit Keurig’s official website or refer to the user manual provided with your purchase․
11․2 Contacting Keurig Customer Support
For assistance with your Keurig K-Mini, contact customer support at 1-866-901-BREW (2739) or visit support․keurig․com․ Additional help is available through the Keurig app․ The support team is ready to address any questions or concerns about your brewer, ensuring optimal performance and satisfaction․
The Keurig K-Mini offers a perfect blend of convenience, compact design, and user-friendly features, making it ideal for coffee lovers seeking a hassle-free brewing experience every day․
12․1 Final Tips for Optimal Performance
Regularly clean and descale your Keurig K-Mini to prevent mineral buildup and maintain performance․ Use filtered water for better taste and avoid distilled water․ Always check K-Cup compatibility and ensure proper pod insertion․ Clean the needles and drip tray frequently to prevent clogs․ Utilize the auto-off feature for energy savings and store the brewer properly when not in use․ Refer to the manual for troubleshooting common issues and enjoy consistent, high-quality brewing․
12․2 Enjoying Your Keurig K-Mini Experience
Maximize your Keurig K-Mini experience by experimenting with different K-Cup flavors and settings․ Keep your brewer clean and well-maintained for optimal performance․ Utilize features like Auto-Off for energy efficiency and cord storage for convenience․ Pair it with a travel mug for on-the-go brewing․ Explore the wide variety of compatible pods to find your perfect cup every time․ Enjoy the convenience and versatility of your compact coffee companion․ Happy brewing!