
Singer Start 1304 Manual: A Comprehensive Guide
This manual provides detailed instructions for the Singer Start 1304 sewing machine, covering setup, operation, maintenance, and safety. It’s designed for both beginners and experienced sewers, ensuring a smooth and enjoyable sewing experience.
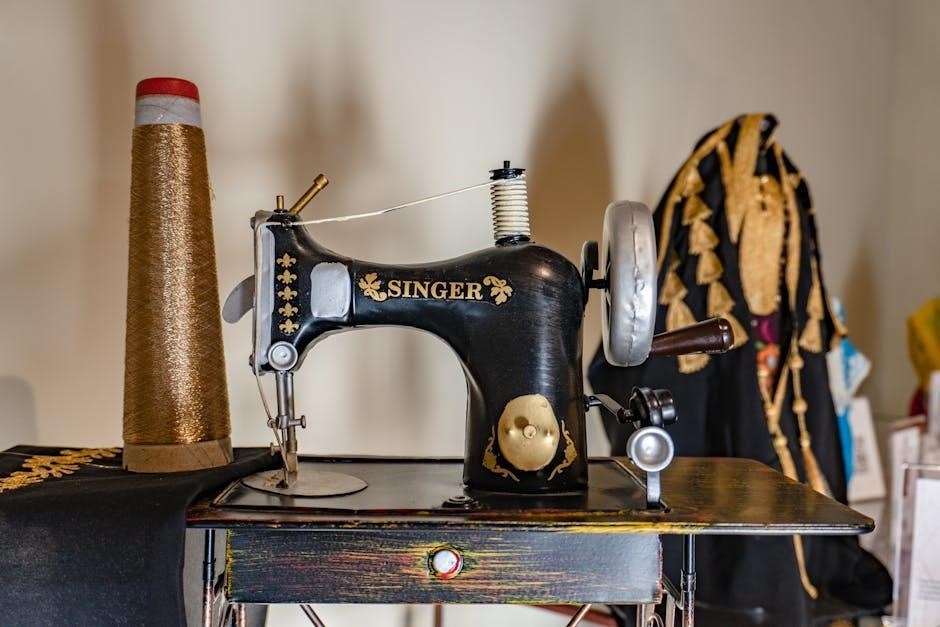
The Singer Start 1304 is a popular, user-friendly sewing machine designed for both beginners and those with some sewing experience. It’s a mechanical machine, meaning it’s powered by a traditional motor and operated with dials and levers, offering a straightforward sewing experience without complex digital features. This machine excels at handling everyday household sewing tasks, from simple repairs and alterations to crafting projects.
One of the key benefits of the Singer Start 1304 is its simplicity. Stitch selection, length, and width are pre-set, eliminating guesswork for new users. The free arm design allows for easy maneuvering of cylindrical items like sleeves and pant legs, enhancing versatility. It features a convenient 4-step buttonhole function, enabling users to create professional-looking buttonholes with ease.
This machine is built for reliability and affordability, making it an excellent entry point into the world of sewing. The included accessories further enhance its functionality, providing everything needed to get started on a variety of projects. This manual will guide you through each step, ensuring you can confidently utilize all the features of your Singer Start 1304.
What’s Included in the Box: Accessories
Your Singer Start 1304 sewing machine package includes a variety of accessories designed to enhance your sewing experience and tackle diverse projects. A darning plate is included, useful for mending delicate fabrics and creating freehand embroidery. You’ll also find a set of needles, catering to different fabric types and weights, ensuring optimal stitch quality.
Several bobbins are provided to get you started, eliminating the immediate need for replacements. A handy seam ripper is also included – an essential tool for correcting mistakes and removing unwanted stitches cleanly and efficiently. These accessories are thoughtfully selected to cover common sewing needs.
Beyond these core items, the package typically contains a power cord, a foot pedal for hands-free operation, and this comprehensive instruction manual. These components work together to provide a complete and user-friendly sewing solution. Keeping track of these accessories will maximize the versatility and longevity of your Singer Start 1304.
Key Features of the Singer Start 1304
The Singer Start 1304 is designed with simplicity and ease of use in mind, making it ideal for beginners. It’s a mechanical sewing machine, offering reliable performance for everyday sewing tasks. A standout feature is the free arm, which facilitates sewing cuffs, sleeves, and other cylindrical shapes with greater convenience and control.
This machine boasts a practical 4-step buttonhole function, allowing users to create neat and consistent buttonholes with minimal effort. Stitch selection is straightforward, utilizing a simple dial system. Furthermore, the stitch length and width are pre-set, removing the complexity of manual adjustments and ensuring consistent results.
The Singer Start 1304 is specifically engineered for sewing purposes, providing a focused and efficient sewing experience. Its robust construction and user-friendly design make it a dependable choice for handling various household sewing needs, from basic repairs to simple projects. It’s an affordable and reliable option for those new to sewing.
Setting Up Your Singer Start 1304
Proper setup is crucial for optimal performance. This section details how to prepare your Singer Start 1304 for sewing, including threading, bobbin winding, and initial adjustments.
Threading the Machine: A Step-by-Step Guide
Threading the Singer Start 1304 correctly is fundamental to successful sewing. Begin by ensuring the machine is turned off and unplugged. Raise the presser foot; this opens the tension discs, allowing the thread to seat properly. Place the spool of thread on the spool pin.
Next, guide the thread through the first thread guide, then down and around the tension disc. Continue threading through the take-up lever – ensure the thread is securely seated in the lever’s notch. From the take-up lever, thread down through the second thread guide.
Finally, thread the needle from front to back. A needle threader can be helpful! Pull several inches of thread through the needle. To confirm correct threading, gently tug on the thread; it should move smoothly through all guides. Incorrect threading can cause skipped stitches or tension issues, so double-check each step.
Winding the Bobbin
Winding the bobbin on your Singer Start 1304 is a straightforward process. First, place the spool of thread onto the spool pin. Then, draw the thread through the thread guide, and onto the bobbin. Secure the thread end to the bobbin by wrapping it around a few times – some bobbins have a small slot for this purpose.
Next, slide the bobbin onto the bobbin winder spindle. Push the bobbin winder spindle to the right, engaging it with the drive wheel. Simultaneously, gently press down on the bobbin winder arm. This initiates the winding process.
Hold the thread tail for the first few wraps to prevent slippage. Allow the machine to wind the bobbin evenly. Once full, the bobbin winder will automatically stop. Cut the thread, remove the bobbin, and trim any loose ends. A properly wound bobbin is crucial for consistent stitch quality.
Inserting the Bobbin
Inserting the bobbin correctly into your Singer Start 1304 is essential for proper stitching. Locate the bobbin case – it’s typically a small compartment on the front of the machine. Open the bobbin cover to access the bobbin area.
Gently pull out the bobbin case. Insert the wound bobbin into the bobbin case, ensuring the thread unwinds in the correct direction (usually clockwise, but check your machine’s diagram). Guide the thread through the tension spring on the bobbin case.
Reinsert the bobbin case back into its compartment, ensuring it clicks securely into place. Finally, draw the bobbin thread through the thread guide, and then up through the needle plate opening. A correctly inserted bobbin and properly threaded machine are vital for achieving even and consistent stitches.

Basic Operation
Operating the Singer Start 1304 is straightforward. Select a stitch, adjust length/width (preset options simplify this), and begin sewing by pressing the foot pedal. Consistent results are guaranteed!
Selecting a Stitch

The Singer Start 1304 simplifies stitch selection with its user-friendly dial. This machine is designed to eliminate stitch guesswork, offering preset stitch lengths and widths for ease of use. To choose a stitch, simply rotate the stitch selection dial to the desired option. The available stitches are clearly indicated around the dial, allowing for quick and accurate selection.
The Singer Start 1304 primarily features a straight stitch and a zigzag stitch. The straight stitch is ideal for constructing seams and general sewing tasks, while the zigzag stitch provides versatility for finishing raw edges, creating decorative effects, and sewing stretch fabrics. A dedicated 4-step buttonhole stitch is also included, enabling users to create professional-looking buttonholes with minimal effort.
Before starting a project, always test the selected stitch on a scrap piece of fabric to ensure it meets your requirements. This allows you to verify the stitch length and width and make any necessary adjustments before working on your final garment or project. Remember, the machine’s simplicity is a key feature, making stitch selection a breeze for beginners.
Adjusting Stitch Length
The Singer Start 1304 is designed for simplicity, and this extends to stitch length adjustment. Unlike more complex machines, the stitch length on the Start 1304 is pre-set, meaning it isn’t manually adjustable by the user. This feature streamlines the sewing process, removing any guesswork and ensuring consistent stitch quality for beginners.
The pre-set stitch length is optimized for a wide range of general sewing applications, making it suitable for everyday projects like garment construction, basic repairs, and crafting. While you cannot change the length, this setting provides a reliable and versatile stitch suitable for most common fabrics and sewing needs.
This simplification is intentional, aiming to provide a hassle-free experience for those new to sewing. It eliminates the need to experiment with different stitch length settings, allowing users to focus on learning the fundamentals of sewing without being overwhelmed by technical details. Testing on scrap fabric is still recommended to familiarize yourself with the pre-set length.
Adjusting Stitch Width

Similar to stitch length, the Singer Start 1304 prioritizes ease of use by featuring a pre-set stitch width. This means the width of the zigzag stitch, and other applicable stitches, cannot be manually adjusted by the user. This design choice simplifies operation, particularly for beginners who may find variable width settings confusing.
The factory-set stitch width is carefully determined to provide a versatile and effective zigzag for a variety of applications, including finishing raw edges, creating decorative stitches, and sewing stretch fabrics. While lacking adjustability, this width strikes a balance suitable for common sewing tasks.
This pre-set functionality removes the potential for incorrect width settings that could lead to puckering or uneven stitching. It allows users to concentrate on mastering basic sewing techniques without the added complexity of width adjustments. Always test on scrap fabric to understand the pre-set width’s effect before working on your final project.

Starting and Stopping the Machine
Beginning to sew with the Singer Start 1304 is straightforward. Ensure the machine is properly threaded, bobbin inserted, and fabric positioned under the presser foot. Gently press the foot pedal to initiate sewing; the speed is directly proportional to the pressure applied. Lighter pressure results in slower stitching, while increased pressure increases speed.
To stop sewing, simply release the foot pedal. The machine will immediately cease operation. It’s crucial not to abruptly yank the fabric while sewing, as this can cause needle breakage or fabric distortion. Always lift the presser foot and carefully pull the fabric away from the needle.
For precise stopping points, especially at corners, stop with the needle in the down position (achieved by fully depressing the foot pedal and then releasing). This secures the fabric and allows for easy pivoting. Remember to always unplug the machine when not in use, and never leave it running unattended.

Stitch Types and Applications
The Singer Start 1304 offers essential stitches like straight, zigzag, and a 4-step buttonhole. These versatile options cater to basic sewing, repairs, and simple crafting projects.
Straight Stitch: Uses and Techniques
The straight stitch is the most fundamental stitch, and the Singer Start 1304 excels at creating it. This stitch is incredibly versatile, suitable for a wide range of sewing applications. Primarily, it’s used for constructing garments – joining fabric pieces together to form seams. Beyond clothing, the straight stitch is perfect for quilting, topstitching, and basting layers of fabric before a final seam.
To achieve a strong and neat straight stitch, ensure your fabric is properly aligned under the presser foot. Maintain a consistent sewing speed and guide the fabric gently; avoid pulling or pushing it. The Singer Start 1304 has preset stitch lengths, simplifying the process. For lightweight fabrics, a shorter stitch length provides greater security, while heavier fabrics benefit from a slightly longer stitch. Practice on scrap fabric to familiarize yourself with the machine’s performance and achieve consistent results. Remember to backstitch at the beginning and end of each seam to secure the stitches and prevent unraveling.
Zigzag Stitch: Versatility and Applications
The zigzag stitch on the Singer Start 1304 unlocks a world of creative possibilities beyond simple seam construction. Unlike the straight stitch, the zigzag’s back-and-forth motion provides elasticity, making it ideal for sewing knit fabrics that require stretch. This prevents seams from breaking when the fabric is stressed.
Beyond knits, the zigzag stitch is invaluable for finishing raw edges, preventing fraying and creating a professional look. It’s also excellent for appliqué, allowing you to securely attach fabric shapes to a background. Furthermore, the zigzag can be used for decorative stitching, adding texture and visual interest to your projects. While the Singer Start 1304 has preset stitch widths, experimenting with different settings allows for varied effects. Remember to test on scrap fabric to determine the optimal width for your specific fabric and desired outcome. Mastering the zigzag stitch significantly expands the range of projects you can tackle with your machine.
4-Step Buttonhole Stitch: A Detailed Guide
The Singer Start 1304 simplifies buttonhole creation with its convenient 4-step buttonhole feature. Begin by attaching the buttonhole foot to your machine – this is crucial for accurate results. Next, position your fabric, ensuring the buttonhole placement aligns with your button. The first step creates the initial tack, securing the start of the buttonhole.
The machine then automatically stitches the sides of the buttonhole, following a pre-programmed width. The third step reinforces the buttonhole opening, and finally, it creates a finishing tack to prevent unraveling. Always test on a scrap of fabric first to ensure the buttonhole size accommodates your chosen buttons. Refer to your manual for specific buttonhole foot instructions and troubleshooting tips. Consistent fabric placement and using the correct buttonhole foot are key to achieving professional-looking buttonholes every time with your Singer Start 1304.

Maintenance and Troubleshooting
Regular cleaning, lubrication, and addressing common issues will ensure your Singer Start 1304 operates smoothly. This section details how to maintain peak performance and resolve typical problems.
Cleaning Your Singer Start 1304
Maintaining a clean sewing machine is crucial for optimal performance and longevity of your Singer Start 1304. Before any cleaning, always unplug the machine from the electrical outlet. Dust and lint buildup can cause malfunctions and affect stitch quality, so regular cleaning is essential.
Begin by removing the needle and bobbin case. Use the brush accessory (often included with the machine) to gently remove lint from the bobbin area, feed dogs, and around the needle plate. A small vacuum cleaner with a brush attachment can also be helpful for removing stubborn lint.
Wipe down the exterior surfaces of the machine with a soft, slightly damp cloth. Avoid using harsh chemicals or abrasive cleaners, as these can damage the finish. For hard-to-reach areas, a cotton swab dipped in rubbing alcohol can be used carefully. Pay particular attention to cleaning around the stitch selector dial and tension controls. Remember to dry all surfaces thoroughly before resuming operation. Consistent cleaning will keep your Singer Start 1304 running efficiently for years to come.
Lubrication Guide
Proper lubrication is vital for the smooth operation of your Singer Start 1304 sewing machine, minimizing friction and preventing wear. However, modern sewing machines, including the Start 1304, generally require minimal oiling. Over-oiling can attract dust and lint, creating more problems than it solves.
Refer to your machine’s manual for specific lubrication points. Typically, oiling is recommended for the bobbin case hook and the race area – the area where the bobbin case sits; Use only sewing machine oil; never use oil intended for other purposes. Apply a very small drop of oil to these areas, and then operate the machine briefly to distribute the oil evenly.
Avoid oiling the feed dogs, tension discs, or any plastic components. These areas are designed to operate without lubrication. If you are unsure about any aspect of lubrication, consult a qualified sewing machine technician. Regular cleaning, as described in the previous section, is often more important than frequent oiling for maintaining your Singer Start 1304.
Troubleshooting Common Issues
Encountering problems with your Singer Start 1304 is common, but many are easily resolved. If the machine doesn’t start, ensure it’s plugged in correctly and the power switch is on. Threading errors are frequent; re-thread the upper and lower threads, following the manual’s instructions carefully.
Skipped stitches often indicate a bent or dull needle – replace it with a new one of the correct type and size. If the fabric puckers, adjust the stitch length or tension. Bobbin issues, like tangled thread, require removing the bobbin case and cleaning it thoroughly. Always unplug the machine before attempting any repairs.
If the machine makes unusual noises, stop immediately and check for obstructions or improper lubrication. Refer to the manual’s diagrams for assistance. For more complex issues, or if you’re uncomfortable performing repairs yourself, consult a qualified sewing machine technician. Remember safety first – never force anything!

Safety Precautions
Always prioritize safety when using the Singer Start 1304. Avoid electrical hazards by unplugging the machine when not in use and keep fingers clear of moving parts.
Electrical Safety Guidelines
To ensure safe operation of your Singer Start 1304, adhere to these electrical safety guidelines. Always verify the voltage indicated on the machine matches your household supply before plugging it in. Never operate the sewing machine with a damaged cord or plug; immediate replacement is crucial. Avoid using extension cords if possible, and if necessary, ensure it’s adequately rated for the machine’s power consumption.
Never immerse the sewing machine, foot pedal, or power cord in water or any other liquid. This poses a severe electrical shock risk. Disconnect the machine from the power outlet immediately after use and before performing any maintenance, including cleaning, changing the needle, or lubricating. Do not operate the machine in damp or wet locations.

Regularly inspect the power cord for any signs of damage, such as fraying or cracking. If damage is detected, discontinue use and have the cord replaced by a qualified technician. Avoid pulling or carrying the machine by the power cord. Always grasp the machine itself when moving it. Keep the power cord away from heated surfaces and sharp edges.
Safety Around Moving Parts
The Singer Start 1304 contains moving parts that can pose a risk of injury. Keep fingers, hair, and loose clothing away from these components while the machine is operating. Never reach under the presser foot while the needle is in motion. Always turn off the machine and unplug it from the power source before attempting to clear jams, change the needle, or perform any maintenance.
Exercise extreme caution around the needle, as it moves rapidly and can cause punctures. Never sew over pins or thick materials that may damage the needle. If a needle breaks, immediately stop the machine, unplug it, and carefully remove the broken pieces. Avoid touching the bobbin area while the machine is running, as the rotating hook can cause injury.
Supervise children closely when the sewing machine is in use or stored nearby. Ensure they understand the dangers of moving parts and are kept at a safe distance. Never allow children to operate the machine unsupervised. Always use the appropriate attachments and accessories as specified in this manual to prevent damage and ensure safe operation.
General Safety Instructions
Always read all instructions in this manual before operating the Singer Start 1304. This sewing machine is designed for household use only and should not be used for commercial purposes. Never operate the machine if it has a damaged cord or plug, or if it is malfunctioning in any way. If the supply cord is damaged, it must be replaced by the manufacturer or a qualified service technician.
Do not immerse the machine in water or any other liquid. Avoid using outdoors or in damp environments. Always unplug the machine from the electrical outlet when not in use, before cleaning, or before changing parts. Never pull the cord to disconnect the machine from the outlet; grasp the plug instead. Ensure the machine is stable and placed on a flat, level surface during operation.
This machine complies with relevant safety standards (IEC/EN 60335-2-28 and UL1594). However, responsible operation and adherence to these instructions are crucial for preventing accidents and ensuring safe use. Keep this manual in a safe place for future reference and always follow the provided guidelines.